Friday, May 13, 2011

PART II - TEMPTUPRO HAUL & INITIAL REVIEW

Hi guys


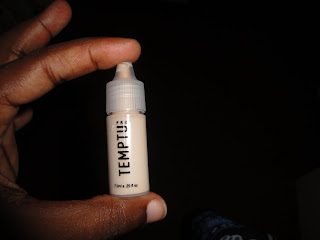
I'm back with part II of my review and I want to go straight into it as its a couple pieces that I want to show off...I recently went to my local supplier of Temptupro Products and stumbled on this little beauty and I was instantly hooked just from the packaging.

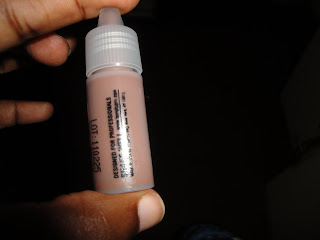
Its called the Airbrush S/B Multicolor Starter Kit and it contains 12 shades, 10 matte and 2 shimmers and the brand boasts of the ability to use this allover the face - lips, cheeks and eyes.  I swatched each of them just to show how intense the colors are.

They are all coded so I will list them out first:
  1.  070 - Navy
  2. 071 - Java (a chocolate color)
  3. 072 - Teal
  4. 073 - Ecru (reminds me of taupe)
  5. 074- Slate
  6. 075 - Moss (not swatched though)
  7. 076 - Wine
  8. 077 - Apricot
  9. 078 - Brick
  10. 079 - Lavender
I didn't get all of the colors swatched on my arm though as my camera began to 'conk' out but this one shows how potent these colors are.  I intend to mix it up with other conventional products and use them exactly as they've said especially on the lips as direct lip colors like Apricot and Java.  The Ecru color is interesting and looks like a great eyeshadow color.


I'm using it tomorrow so I can't wait....

 DAJ Signing Out!


Wednesday, May 11, 2011

SIGMA BRUSH & TEMPTUPRO HAUL & INITIAL REVIEW

Hi guys

I'm back with another review, this time with hot of the presses sigma brushes out of the box and a mini-kit of TemptuPro Multicolor S/B airbrush colors.  I haven't had the opportunity to try them out yet but I will still give my initial thoughts on them.  Lets go to the brushes first, shall we?

Sigma Brushes

 The three brushes that I chose in particular were specific to eyeshadow, undereye and contouring powder application.  The first brush - the E50 or the Large Fluff Eyeshadow brush is designed to apply single shades allover the eyelid or assist with contouring and highlighting on the cheekbone.  Its very large in shape with a nice, sturdy handle.  The bristles are dense with a slightly curved edge to do layering of eyeshadow.  I noticed that the bristles shed a bit but its not this great amount to get worked up over so, I guess when I give the first wash it'll stop.

The second brush is the F84 or the Angled Top Kabuki which is part of a special trio which boasts of precise blending and application.  I have the other brush, F80 and its wonderful in application and yes that boast of precision is very correct.  Each of my clients that had the F80 treatment they noted the difference.  The brush is a short brush with synthetic materials and can be used to contour with powder and cream products.

The third brush is the F35 or the Tapered Highlighter.  This one I am particularly excited to use as I have been searching for a brush that can deposit the right amount of under-eye powder to softly highlight the under-eye area.  I love the tapered shape and playing around with it, it feels so soft and goes directly to the areas that I target as opposed to going allover the place.  The bristles are supposed to blend seamlessly into the product and ensure that there is a flawless application with no streaking or pockets anywhere. Excited to use them!!!!

Tomorrow, I will continue with the TemptuPro Mini Starter Kit, so stay tuned!

Sunday, May 8, 2011

My New Zuca Makeup Case - Backpack Pro


Hi Guys

I'm back with a review of my newest makeup case.  Although I have a couple makeup cases of varied designs, I have been looking for that elusive one that could give me several key things:
  • Organisation & Attractive design
  • Comfort and Ease of Travel
 Since I've been a makeup artist - for at least 4 years, I have always needed a case that can help me become more organized (I am not really) and assist me in finding my products quickly for multiple clients, so like the proverbial princess, I kissed a couple frogs....
 
My First Case
My first case was a little one that was handheld and contained 1 level with two sets of drawers that are expandable.  For a newbie, this perfect however when I started to become more knowledgeable about products and started carrying an eclectic set of these products, they could no longer fit comfortably in the case.  Another downside was the problem of it being made with a metal finish and the heat melted the cream products, so you can just imagine the mess.
 
So, I ached for more space, so I went to www.yazmo.com and found a cutie case.  The pic below is not the exact case but the functionality was similar to the one I that owned before.  It contained two levels with expandable drawers with the 2nd level being large and open enough to fit tall bottles and palettes.  It was helpful for a while however it was heavy and I had to lug it around with the other case to gigs and that difficulty wasn't pretty.  Did I mention it was also contained a metal finish, so you know what happened when it was in my car?!  

Another pet peeve that I have with these cases is that they cannot stand upright in my trunk so once I make a turn around a corner, it falls and there will be spillage or disarray of products.

       
Pic courtesy Yazmo.com
Case Number 2
 On to my next case.  I made mental notes and started to get more sophisticated in understanding the designs out there and trying to match with my needs, therefore I came up with a ZUCA pro case.
This one, I really liked as its really strong but was made of a soft material and it contained a lot of open space and zipper pouches that stacked like drawers inside (you get 4).  It also has a flat top that could double as a seat if there wasn't any available.  I had this for a year (still do) but I stopped using it as the makeshift shelving started to irritate me since I had to pack and unpack my products every time I did gigs and it was getting tiresome. 

The other problem was the fact that not every time I could be transported to a hotel where I don't have stairs to climb and trust me it can get heavy.  It took a toll on my back after awhile.
 

Pic courtesy Zuca
My ZUCA Pro Case


My latest case I found via www.yazmo.com (did I mention its excellent for purchasing cases at dirt cheap prices?) from the brand Tas Merah.  Its cute, its very well organized and so damned attractive.  As you can see its the latest in soft rolling cases out there with sections for brush sets at the top, drawers of either 4 or 5 depending on the size you purchase.  A section for just tissues and other pockets for bigger bottles on the right side of the case are available.

It is one of the best purchases I have made so far as I was very well organised but the only complaint I can make about it is that its heavy when I put all my airbrush stuff together with the conventional products.

My Current Case


So in keeping with the soft fabric design of these cases but looking to simplify for my physical comfort, I stumbled upon a review of my latest case from EnkoreMakeup - YouTube Beauty Guru and purchased the Zuca Backpack Pro.

The pics below show how I already stuffed it with my products both airbrush and conventional, and what's also great about it is that its light, won't fall over and can hold a ton of stuff.  Its also marketed by Zuca as a case for hairstylists, so take note.

You can go to this link to get the actual details and what is offered. Zuca Backpack Pro Details


Tuesday, April 19, 2011

PLAYING UP YOUR BEST ACCESSORY - YOUR SKIN!

Hi folks

Let me introduce the make-up minimalist – this is the woman whose sole aim is to use make-up to create the look of clean, fresh and glowing skin.

She recognises the overall beauty of her skin and is willing to celebrate that by using neutral colours meant to accentuate her skin tone and underlying textures.

Thankfully this means that the days of the overly “made up” face are quickly receding as women look towards make-up as the means to flatter and reveal what wasn’t so easily distinguishable before.


To successfully create a daily look like the one I have done here, you should remember a light hand will do the trick as only spot coverage will be required and not paste the foundation all over the entire face.


GET THE LOOK


Skin Prep

This is critical here even if you have oily/oily combination skin and should not be skipped. 
The purpose of a good moisturiser is to help create an additional barrier to the skin’s defences against the elements. 

In fact, regular use of moisturisers lessens the occurrence of dry, rough, scaly, itchy skin and minor skin irritations whilst ensuring that the make-up is applied smoothly and evenly.

Tip: Apply moisturiser to the face and neck area and then use a two-ply tissue and gently press onto the face. 
This helps to absorb the extra oils and create a more matte surface.

 
Foundation and powder application
For my model Regina, I gave her the airbrush treatment by creating a look playing with varied shades of brown to have that dewy, glowing skin whilst focusing on very soft contours around her face and her inner eyes.


If airbrush make-up is not available, depending on your skin type, alternative foundations such as cream or liquid formulas can be used but keep in mind, only dots of foundation on blemishes will give that level of flawless coverage and still look minimal.


Tip: Remember to always blend.


To apply, use either a sponge or foundation brush and gently pat the product on only the areas that require the coverage. 
A great coverage alternative happens to be one of my personal favourites, the Black Opal stick foundation or the True Colour Liquid Foundation.

The application of powder should be very light and translucent powder does the trick. If you’re concerned about oil build up during the day, you can use either tissues or blotting sheets in the oily areas and they will quickly grab the oil without disturbing all of your great work.


Eyes

The eyes were initially contoured with several shades of rich brown hues to create a deeper contour into the eyes while still maintaining that clean look. I then continued with a touch of bronze-gold on the eyelids and a quick application of black liquid liner. The look was completed with the application of wispy false eyelashes.


Lips

In this case, continue with the “less is more” thinking, use just a simple lining of lip pencil in a neutral skin tone with a touch of lip gloss and that will be a great finish.


Credits:


Jewelry - Star Jewels on Facebook


Photographer by Johari Studios info @ joharistudios.com


Model - Regina King
spacer


Wednesday, April 13, 2011

NEW BEAUTY COLUMN

Well its only April and the year is consistently changing for the beauty business.  I am happy to say that I have been able to provide weekly beauty articles to one of the national newspapers - Trinidad NEWSDAY and you can check this out every Tuesday.


The first article is below.

Click here.